MAPS OF HISTORY · MONGOL EMPIRE · BATTLES AND EVENTS · Siege of SamarkandMongol Empire · BATTLE SITE · 1220
Siege of Samarkand (1220)
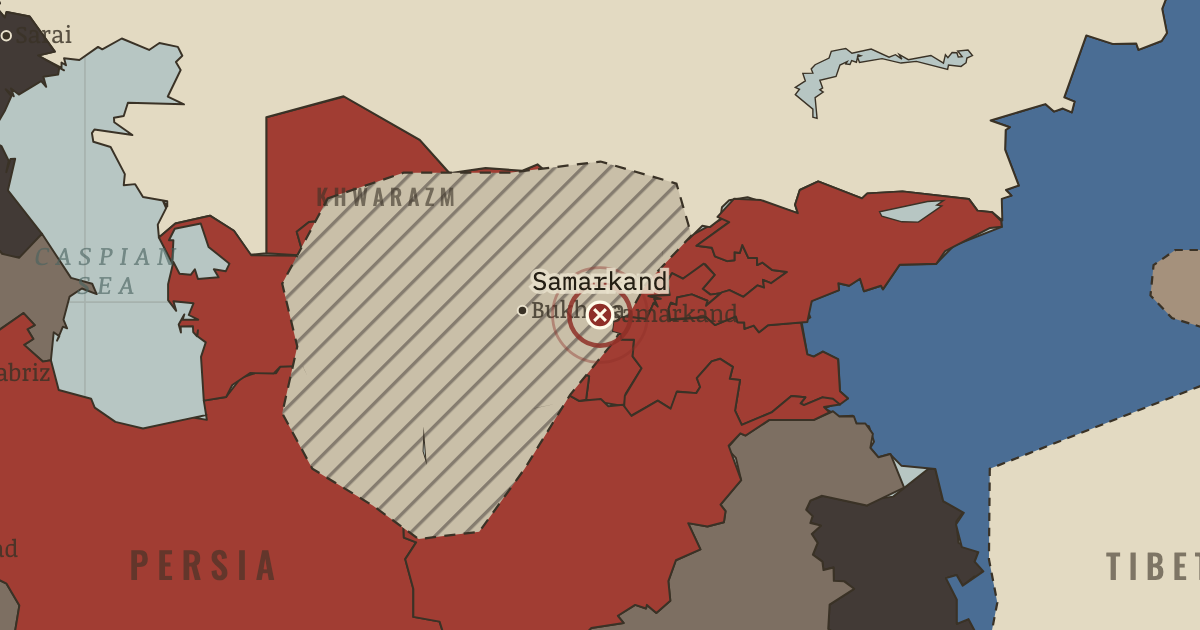
On the Mongol Empire map as “Samarkand”
Mar 1220 — Samarkand, the shah’s capital, has a garrison of 40,000, yet surrenders within days. The conquerors pull down its walls and deport thousands of craftsmen east. The shah has already fled west, with Jebe and Subötai in pursuit.
When Mar 1220 Type Battle site Chapter Mongol invasion of Khwarazm (chapter 4 of Mongol Empire)Atlas The Mongol Empire, 1206–1294 BATTLE SITE · THE MONGOL EMPIRE, 1206–1294 These maps are reconstructed from published sources · Cliopatria v0.2.1 — historical political boundaries · Peter Jackson, Encyclopaedia Iranica — Mongols · Natural Earth — physical reference geography
Source details Cliopatria contributors / Seshat Global History Databank. CC BY 4.0 · Selected dated polygons; documented unions, differences and shared edges for event-specific reconstructions; projected for display. Peter Jackson / Encyclopaedia Iranica. Historical facts consulted; thematic geometry independently reconstructed Natural Earth. Public domain The source stage comes later than the conquest of Khorasan. A regional patch anchored to cities transfers the documented conquest corridor within the later Mongol outline; its inferred edge is disclosed.
Published polity extents are used at the date resolution available in their sources. Hatched affected regions and route arrows are educational reconstructions; the source details distinguish them from imported boundaries.
reconstruction: 1169–1226 · reconstruction: 1188–1235 · reconstruction: 1202–1249 · reconstruction: 1206–1226 · reconstruction: 1210–1226 · reconstruction: 1210–1235 · reconstruction: 1210–1240 · reconstruction: 1216–1226 · reconstruction: 1216–1235 · reconstruction: 1219–1221 · reconstruction: 1220–1226 · reconstruction: 1220–1235 · reconstruction: 1221 · vector: 1056–1249 · vector: 1072–1226 · vector: 1072–1235 · vector: 1072–1249 · vector: 1072–1325 · vector: 1072–1374 · vector: 1094–1235 · vector: 1099–1226 · vector: 1111–1278 · vector: 1126–1226 · vector: 1139–1226 · vector: 1139–1235 · vector: 1139–1240 · vector: 1139–1259 · vector: 1152–1235 · vector: 1169–1226 · vector: 1169–1235 · vector: 1188–1240 · vector: 1188–1259 · vector: 1188–1271 · vector: 1188–1284 · vector: 1188–1304 · vector: 1192–1235 · vector: 1192–1325 · vector: 1192–1362 · vector: 1202–1235 · vector: 1202–1240 · vector: 1202–1249 · vector: 1202–1259 · vector: 1202–1374 · vector: 1202–1743 · vector: 1206–1235 · vector: 1206–1240 · vector: 1210–1226 · vector: 1210–1249 · vector: 1210–1304 · vector: 1216–1226 · vector: 1216–1235 · vector: 1216–1240 · vector: 1216–1249 · vector: 1220–1226 · vector: 1220–1235 · vector: 1220–1240 · vector: 1220–1249 · vector: 1220–1313 · vector: 602–1501 · vector: 936–1271
Layer records and reconstruction methods
In the same chapter
Related
THE FREE PRINTABLE STUDY GUIDE
Get the printable study guide for The Mongol Empire free. I’ll send you a few short letters, then one when a new atlas opens. That’s all. — Paul
NO TRACKING · YOUR ADDRESS IS USED FOR THE DISPATCH AND NOTHING ELSE ·
UNSUBSCRIBE ANYTIME